Monday, January 31, 2011

Salad JUST Like At An Italian Restaurant


This salad is the perfect example of why I don't like bottled salad dressing. This one takes slightly bit more effort, but it seriously tastes as good as if you ordered it out at an Italian restaurant. I love love love this salad! The mild banana pepper rings are simply an amazing addition. This salad would be delicous with lasagna and/or garlic bread. We had it for lunch over the weekend and it may just become one of our staples. Try it on your next Italian dinner night--I guarantee your family will like it.

ITALIAN RESTAURANT SALAD
Adapted from www.thesweetslife.com

Serves 2-4 (depending on what else you are serving)

Dressing:
3 Tbsp. olive oil
2 Tbsp. red wine vinegar
2 tsp. lemon juice
1 tsp. salt
1/2 tsp. sugar
1/2 tsp. oregano
1/4 tsp. pepper
2 cloves garlic, minced finely

Salad:
8-10 cups torn leaf & romaine lettuce
1-2 tomatoes, cut into wedges
1/2 cup grated carrots
1/2 cup mild banana pepper rings
1/4 cup black olives (Kalamata are preferred, but you can do Spanish black olives instead)
1/4 cup freshly grated Parmesan cheese
Croutons, optional

Whisk together all dressing ingredients in a small bowl. Cover until serving (don't need to refrigerate). You can even make the dressing in advance.

Toss lettuce with tomatoes, carrots, banana peppers, olives, and cheese. Add dressing and toss until well-coated. Serve immediately.

Sunday, January 30, 2011

EASY French Toast to Die For


Thank you Mark Bittman for the best basic French bread recipe. I have built upon it by adding oats, flax meal, wheat germ, and topping the toast with fresh peaches and cashews. Ok, so maybe we had to defrost the peaches--not much to work with in January, but still....very, very good. I think almost Mother's Day/Father's Day-worthy. Bittman recommends using challah bread (especially instead of white Wonder bread....), but since it's so hard to find (and I haven't tried making that yet), we used an everyday white bread I recently made. I will post on that recipe soon (but frankly, getting a little worried my audience is sick of the bread posts by now). But,you can use any bread you have on hand--it's an especially great use for bread that may be going stale.

Anyway, I'm sharing Bittman's recipe with you because 1) Every family needs a french toast recipe as part of breakfast repertoire and 2) Because it's good. I hope you will love this french toast as much as our family does. By the way, despite its name, French toast is NOT from France. Apparently, there is mention of the dish from the 4th or 5th centuries in Rome. And a similar dish was very popular in the middle ages. These days, the English call it 'Eggy Bread.'


FRENCH TOAST
Adapted from How to Cook Everything by Mark Bittman

You can make this dish eggier by adding less milk. If you like mushy French toast--you may need more batter as you will want to soak your bread in the batter more so than 'dip' it. If you like your French toast on the crispy side, add 1/2 cup flour to the batter. You can also make it by crispy by dredging the battered toast in sweetened bread crumbs or crushed cornflakes (my personal favorite).

Makes 4 servings

2 eggs
1 cup milk
Dash of salt
1 Tbsp. sugar (optional-I always skip this because adding syrup is sweet enough)
1 tsp. vanilla extract and/or ground cinnamon (I like to add them both)
Butter or canola oil (as needed)

My add-ins--BESIDES the 1/2 cup of flour which makes it crispy--our favorite:
1/2 cup oatmeal
1 Tbsp. wheat germ
1 tsp. ground flax meal

Preheat a large griddle or skillet over medium-low heat while you prepare the liquid mixture.

Beat the eggs lightly in a broad bowl and stir in the milk, salt, and optional ingredients (if you are using any of them).

Add approximately 1 tsp. of butter or oil to the griddle or skillet and when it is hot, dip each slice of bread into the batter and turn it over to get both sides covered. Then place the toast on the griddle adnd cook until nicely browned on each side, turning as necessary (you may find that you can raise the heat a bit). Serve, or hold in a 200 degree F oven for up to 30 minutes.

Serve with warm maple syrup and fruit/nuts. We tried them with cashew pieces and fresh peaches, but you can try almond butter and applesauce or berries and cream, etc. There are many possibilities.

Saturday, January 29, 2011

Orange Ginger Cranberry Oat Bundt Cake


Whenever I think of a 'bundt' cake, I think of a scene in the movie, My Big Fat Greek Wedding. I often joked with my husband that parts of our own love story were eerily similar to many parts of that movie. That's usually what happens when an ethnic family and an American family mix--it's a beautifully hilarious juxtaposition of norms.


In the scene I'm referring to, the American groom's parents are invited to the Greek bride's family's home for dinner and the groom's mother brings a bundt cake for the host (bride's mother). This is what I recall went down (upon receiving cake):

Maria Portokalos: "What is it?"
Mrs. Miller: "It's a bundt."
Maria Portokalos: "A Buntttttt?"
Mrs. Miller: "Bundt."
Maria Portokalos: "Bunk?"
Mrs. Miller: "Bundt."
Maria Portokalos: "Buuun-t."
Mrs. Miller: "Bundt, Bundt."
Aunt Frieda: " Einai cake, mori."
Maria Portokalos: "Ohhhh... It's a cake! I know! Thank you! Thank you very much!"
As she walks away, Maria Portocalas: 'There's a hole in this cake!'


Anyway.......fun dinner with the neighbors again and cranberries going bad....time to get creative. I know that bundt cakes are too retro these days as cupcakes have become hip, but I couldn't resist since I need to justify my $3 Nordicware cake pan purchase 7 years ago. The reviews said that the oats give a nice crunch to the cake.

The recipe was modified (by myself) to include candied ginger....I think the flavor combination of cranberry-ginger-orange is wonderful, but you can leave the ginger out if you prefer. There's no denying the genius of orange and cranberries--like lemon & blueberries, cherries & almonds, vanilla & pear, butter & pecans, Fred & Ginger, love & marriage, martinis & aspirin, you get the picture...


ORANGE-GINGER-CRANBERRY BUNDT CAKE
Adapted from Better Homes & Gardens

2-1/4 cups all-purpose flour
1-1/2 cups rolled oats
1 Tbsp. baking powder
1/2 tsp. baking soda
1/2 tsp. salt
3/4 cup butter, softened
1 cup sugar
3 eggs
1 cup milk
2 cups fresh cranberries, chopped
2 Tbsp. sugar
2 heaping Tbsp. candied ginger, chopped (optional)
2 tsp. finely shredded orange peel

Preheat oven to 350 degrees F. Grease and flour a 10-inch tube pan; set aside. In bowl stir together flour, oats, baking powder, soda, and salt.

In large mixing bowl beat butter with electric mixer on medium speed for 30 seconds. Add the 1 cup sugar; beat until well combined. Add eggs; beat until well combined. Alternately add flour mixture and milk, beating on low speed after each addition until combined.

Toss cranberries with 2 tablespoons sugar; fold into batter with orange peel (and candied ginger, if using). Spoon batter into prepared pan; spread evenly.

Bake 50 to 60 minutes or until wooden pick inserted near center comes out clean. Cool in pan 10 minutes. Remove from pan. Cool on rack. Prepare Orange Glaze; spoon over cooled cake. Let stand until glaze is set.

Makes 12 servings.

Orange Glaze:
In small bowl combine 1 cup powdered sugar and 1/2 teaspoon finely shredded orange peel. Add 2 to 3 teaspoons orange juice to make drizzling consistency.


Since my olfactory senses are temporarily suspended, I cannot tell you what it tasted like, but I can share that I got thumbs ups from the guests. I think that this cake might do really well served with some whipped cream and coffee..just a thought.

And since my camera battery died this afternoon at the park (hooray for swing time!), phone picture is all I can provide of cake's interior (sorry). Happy weekend! Hope you all get out and meet your neighbors!

Wednesday, January 26, 2011

Easy Oat (& Molasses) Bread

Before I continue with these bread recipes...I want to clarify something...there may be a lot of words in the recipes, but these bread recipes are EASY & REQUIRE MINIMAL WORK!!!!

Since we have been sick...carbs have been our good friends. Good thing I tried this wonderful bread. Another winner from Nancy Baggett. Unlike the previous posts, this recipe makes two loaves. So freeze one loaf or give it to your neighbor/friend.

You can use honey or molasses in the loaf. I used molasses which resulted in a darker colored loaf. Also, I tried to use some white whole wheat flour in this recipe. I hadn't tried it before. White whole wheat flour is NOT like all purpose flour because it still retains all the nutrition of whole wheat--think of it as 'albino' wheat. It's a different type of wheat. The results end up being lighter colored and milder in flavor. You will love it! I am a real fan now.


EAST OAT BREAD
Adapted from Kneadlessly Simple by Nancy Baggett

*5 1/2 cups (27.5 ounces) unbleached all-purpose white flour or white bread flour, plus more as needed
1 cup old-fashioned rolled oats or quick cooking (not instant) oats, plus 4 tablespoons for garnish
3 Tbsp. granulated sugar
Scant 2 3/4 teaspoons table salt
1 tsp. instant, fast-rising, or bread machine yeast
1/4 cup clover honey or light (mild) molasses (I only had regular molasses)
1/4 cup corn oil or other flavorless vegetable oil, plus extra for coating dough tops and baking pans (I used canola oil)
2 1/4 cups plus 2 tablespoons ice water, plus more if needed

First rise: In a very large bowl, thoroughly stir together the flour, oats, sugar, salt, and yeast. In a large measuring cup, thoroughly whisk the honey and oil into the water. Thoroughly stir the mixture into the bowl, scraping down the sides until the ingredients are thoroughly blended. If the mixture is too dry to incorporate all the flour, stir in just enough more water to blend the ingredients; don’t over-moisten, as the dough should be slightly stiff. Brush or spray the top with oil. Cover the bowl with plastic wrap. If desired, for best flavor or convenience, you can refrigerate the dough for 3-10 hours; this is optional. Then let rise at cool room temperature for 12-18 hours.

Second rise: Vigorously stir the dough. If necessary, stir in enough more flour to yield a hard-to-stir consistency. Generously oil two 8 1/2 x 4 1/2-inch loaf pans. Sprinkle a tablespoon of oats in each; tip the pans back and forth to spread the oats over the bottom and sides. Use well oiled kitchen shears or a serrated knife to cut the dough into 2 equal portions. Put the portions in the pans. Brush or spray the tops with oil. Press and smooth the dough evenly into the pans with an oiled rubber spatula or fingertips. Sprinkle a tablespoon of oats over each loaf; press down to imbed. Make a 1/2-inch deep slash lengthwise down the center of each loaf using oiled kitchen shears or a serrated knife. Tightly cover the pans with nonstick spray-coated plastic wrap.

Let rise using any of these methods: for a 2- to 3-hour regular rise, let stand at warm room temperature; for a 45-minute to 2-hour accelerated rise, let stand in a turned-off microwave along with 1 cup of boiling-hot water; or for an extended rise, refrigerate, covered, for 4 to 24 hours, then set out at room temperature. Continue the rise until the dough nears the plastic. Remove it and continue until the dough extends 1/2 inch above the pan rims.

Baking: 15 minutes before baking time, place a rack in the lower third of the oven; preheat to 375 degree F.Bake on the lower rack for 50 to 60 minutes, until the tops are well-browned. Cover the tops with foil. Bake 10 to 15 minutes more until a skewer inserted in the thickest part comes out with just a few particles clinging to the bottom portion (or until the center registers 208 to 210 degree F on an instant-read thermometer). Bake for 5 minutes longer to be sure the centers are done. Let cool in the pans on a wire rack for 15 minutes. Turn out the loaves onto racks and cool thoroughly.


Yield: 2 medium loaves, about 12 slices each

*I used 3 cups white whole wheat flour & 2 1/2 cups of all purpose flour

This recipe makes the BEST sandwich bread....try it with a BLT-(Turkey) Bacon, Lettuce & Tomato Sandwich when you don't feel like making dinner.

Tuesday, January 25, 2011

Blackberry Farm's Blackberry Cobbler


I don't know if you've ever heard of Blackberry Farm....but this posh Smoky Mountain resort has been featured in many high end magazines, the Martha Stewart show, travel shows, etc, etc. It is on the list of the best resorts in the world and has won numerous awards. This 2,500 acre retreat in humble, Walland, TN is a stone's throw away from my in-laws. Yet, due to the high cost associated with it, my husband and I have never been... But, it hasn't stopped me from googling the farm...I'm fascinated by the gourmet adventure to be had there! They have an on-site bakery, salumaria, wine cellar, creamery, garden, butchery, etc., and they teach cooking classes and host gourmand speakers from all over the world. Sounds dreamy....

If you've been to Costco lately, you will have seen the huge blackberry containers they have available for $3.99! We spend a small fortune in berries for my child there weekly (I reason that when we get her SAT scores back one day, it will have been worth it). This week, sick as I was with the flu (again), I couldn't resist making something cheery on a horribly ugly, rainy day. The blackberry cobbler recipe is one of the signature desserts at Sam Beall's Blackberry Farm.

This is a very quick & easy dessert to make. I loved the buttery biscuit topping on top of the jammy citrus-scented berries. I think you will love this dessert whether it's summer or winter. Serving with ice-cream is purely optional here.


BLACKBERRY COBBLER

Adapted from The Blackberry Farm Cookbook: Four Seasons of Great Food and the Good Life 

Serves 8
 
8 cups fresh blackberries
1¼ cups sugar
Zest and juice of ½ lime
1 Tbsp. cornstarch
1¼ cups all-purpose flour
1¼ tsp. baking powder
¼ tsp. baking soda
1/8 tsp. fine sea salt
6 Tbsp. (3/4 stick) unsalted butter, cut into small cubes and chilled (I used light butter)
¼ cup buttermilk (I used low-fat buttermilk)

Preheat the oven to 350°F.

In a large bowl, toss together the blackberries, 1 cup of the sugar, and the lime zest. In a small bowl, whisk together the lime juice and the cornstarch until smooth. Drizzle the lime juice mixture over the blackberry and toss to combine. Scrape the blackberry mixture into a 10-inch cast-iron skillet and set aside. (I'm sure another dish would be fine too)

In a medium bowl, whisk together the flour, baking powder, baking soda, salt, and the remaining ¼ cup sugar. Use your fingertips to rub the butter into the flour mixture until it is the texture of coarse meal. Make a well in the center of the dry ingredients. Pour the buttermilk into the well and stir with a fork until the mixture comes together.

Crumble the dough evenly over the top of the blackberry mixture. (I recommend placing skillet on a baking sheet to prevent juices from dribbling to bottom of the oven and creating a catastrophe).

Bake the cobbler for 40 minutes, or until the blackberry filling is bubbling and the topping is golden brown. Let the cobbler rest for 10 minutes before serving.


Sunday, January 23, 2011

Sinfully Delicious Orange Flourless (Dark) Chocolate Cake


This is definitely one of the 'champagne' recipes....I know, not exactly healthy. But, it's FAST preparation and EASY to make. Extremely decadent. Worthy of those moments in life where you want to punctuate sentences such as, 'I love you for working like a dog so I can stay home', or 'sorry I ran up the Discover prior to Christmas', or 'can I change your mind about taking that vacation?' or 'happy birthday to a hardworking immigrant mom that I never get to see on her birthday.'  Ha! You get my point...

Being that my mom is visiting on her birthday weekend and she is European, making a traditional cake with buttermilk frosting was completely out of the question. Therefore, this was the perfect opportunity to pull out another 'can't wait to try this when I have people over' recipe that combined her favorite things: dark chocolate and orange flavor. No, this cake is NOT attractive. But that's ok. One bite, and you are lost in love....

This delightfully moist and rich flourless chocolate cake was made for the Reagan family by the French pastry chef Roland Mesnier, during President Ronald Reagan's administration. The recipe is excerpted from the book Chef Mesnier wrote describing the desserts he made during 25 years he served as the White House pastry chef.

This recipe appeared on http://www.epicurious.com/ and had amazingly good reviews. I modified the recipe using salted butter and leaving out the extra 2 Tbsp. of sugar which made it turn out particularly excellent, but the original recipe is below.

ORANGE FLOURLESS (DARK) CHOCOLATE CAKE
Adapted from All the Presidents' Pastries: Twenty-Five Years in the White House, A Memoir

1 1/2 sticks (170 g) unsalted butter, plus extra for greasing
flour, only for dusting
6 ounces (170 g) bittersweet chocolate
1 cup plus 2 tablespoons (220 g) sugar
zest of one large orange
4 eggs, plus 2 egg yolks
1/2 cup (55 g) unsweetened cocoa powder

To serve:
Confectioner's sugar, for dustingcandied orange peel and vanilla ice cream, optional--but, apparently worth it

Preheat the oven to 375°F (190°C). Butter and flour a 10-inch (25-cm) round cake pan. Line the bottom of the pan with parchment paper, then butter and flour the parchment paper.

Gently melt the chocolate over a double boiler. Stir the butter into the chocolate to melt, and stir until smooth.

Remove from the double boiler and whisk the sugar and orange zest into the chocolate mixture. Add the eggs and egg yolks and whisk well. Sift the cocoa powder over the chocolate mixture and whisk the batter until totally smooth. (Below is some of the chocolate I used--a little of each)


Pour the batter into the pan and bake for approximately 35 to 40 minutes, or until the top has formed a good crust. The cake will puff up some, but it will not be as heavy as other flourless chocolate cakes.


Cool the cake in the pan on a rack for 10 minutes. Invert the cake onto a serving platter. Dust with confectioners' sugar and if you like, serve with candied orange peel and/or vanilla (bean) ice cream.

 
Makes about 10 servings.

Saturday, January 22, 2011

Crusty, Seeded (Sesame) Pale Ale Pot Boule (Bread)


I made this a couple days ago on a day when it had snowed....it seemed fitting to make bread on such a wintery day. I LOVE this bread. The texture is amazing...chewy interior with dough wholes, magnificent crisp crust, and wonderful flavor due to the beer and nuttiness of the sesame seeds. Even though I sort of burned the bottom by not setting my kitchen timer appropriately (as can be seen in the pictures), the results of this recipe were great. Again, I took the long way by starting the dough a day or two in advance and just letting it sit....and sit....and sit....no mixing again if you use a mixer. I don't know if I ever want to buy bread again....now if I could only just plan better ahead....

I can't believe what a genius this woman is--Nancy Baggett. Her website is http://www.kitchenlane.com/.


CRUSTY SEEDED PALE ALE POT BOULE
(I'm referring to it as 'European Style Sesame Wheat Beer Bread')
adapted from Kneadlessly Simple by Nancy Baggett

4 1/2 cups unbleached all-purpose white flour, plus more if needed (I used 2 cups all purpose flour, and 1 1/2 cup whole wheat pastry flour PLUS ~1 tsp. vital wheat gluten to help with rise & texture since using the wheat flour)
3 Tbsp. granulated sugar
Scant 2 tsp. plain table salt
3/4 tsp. rapid rising, bread machine or “instant,” yeast
1 12-ounce bottle well-chilled pale ale or beer (IPAs are great for bread)
2/3 cup ice cold water, plus more if needed
Oil for coating dough top (I used an olive oil spray)
1/4 cup sesame seeds or poppy seeds, or a blend of seeds for garnish

First rise: In a large bowl thoroughly stir together the flour, sugar, salt, and yeast. Vigorously stir in the ale and ice water, scraping down bowl sides completely and mixing until the bubbling subsides and the dough is thoroughly blended. If it is too dry to mix together, gradually stir in just enough more ice water to blend the ingredients; don’t over-moisten as the dough should be stiff. If necessary, stir in enough more flour to yield a hard-to-stir dough. Turn it out into a well-oiled 3-4 quart bowl. Brush or spray the top with oil. Tightly cover the bowl with plastic wrap. If desired, refrigerate the dough for up to 10 hours; this is optional. Let rise at cool room temperature (about 70 degrees F) 12-18 hours; if convenient, vigorously stir once during the rise.

Second rise: Using an oiled rubber spatula, lift and fold the dough in towards the center all the way around until mostly deflated; don’t stir. Brush and smooth the dough surface with oil. Re-cover the bowl with nonstick spray-coated plastic wrap. Let rise using any of these methods: for a 1 1/2- to 21/2-hour regular rise, let stand at warm room temperature; for a 45-minute to 2-hour accelerated rise, let stand in a turned-off microwave along with 1 cup of boiling-hot water; or for an extended rise, refrigerate, covered, 4 to 24 hours, then set out at room temperature. Continue the rise until the dough doubles from the deflated size, removing the plastic if the dough nears it.

Baking Preliminaries: 20 minutes before baking time, put a rack in the lower third of the oven; preheat to 450 degrees F. Heat a 4-quart (or similar) heavy metal pot or Dutch oven or a deep 4-quart heavy, oven-proof saucepan in the oven until sizzling hot (check with a few drops of water), then remove it, using heavy mitts. Taking care not to deflate the dough, loosen it from the bowl sides with an oiled rubber spatula and gently invert it into the pot. Don’t worry if it’s lopsided and ragged-looking; it will even out during baking. Very generously spritz or brush the top with water, then sprinkle over the seeds. Immediately top with the lid. Shake the pot back and forth to center the dough.

Baking: Reduce the heat to 425 F. Bake on the lower rack for 55 minutes. Remove the lid. Bake for 10 to 15 minutes longer, or until the top is well browned and a skewer inserted in the thickest part comes out with just a few crumbs on the tip (or until the center registers 208 to 210 degrees F on an instant-read thermometer. Then bake for 5 minutes longer to ensure the center is baked through. Cool in the pan on a wire rack. Remove the loaf to the rack. Cool thoroughly. If you are unsure if the bread is cooked, tap it with a wooden spoon and if it sounds hollow, the bread should be done!

Makes 1 large loaf, 12 to 14 portions or slices.

Wednesday, January 19, 2011

NEW & IMPROVED Healthier Rice Crispies Bars: How to Make Them Bind Better & Still Rock Your World


Ok, so if you have made these bars from my original post, you might have had binding issues. I'm sorry. I am removing the previous post....Turns out Robin McGraw must apparently have some magic, because every time my mother in law and I make these rice crispy bars, we have trouble with them sticking together. But they taste so good that we keep making them!!! But we figured out how to fix the 'sticking together' issue.

I had to repost this recipe with the improved version because the bars are really JUST THAT GOOD and now they are perfect!!!!

So after some trial and error (thanks Carol!)--here's some tricks we've learned:
  • You will most likely need to add 2-3 Tbsp. butter if you are making them with regular rice cereal or brown rice cereal. I tried 'light' butter--and it works. Just add it in with the marshmallows and peanut butter (which we prefer to almond butter).
  • Due to density issues, we have discovered that if you use regular Rice Crispies cereal, you will need 1.5 packages of marmallows (that is 1 and 1/2 packages). If you use the brown rice crispies, you may need only another 1/4-1/2 a package. But let's get real here folks....you need the extra marshmallows for binding. We've tried every which way.
Here is the BEFORE picture without the butter and extra marshmallows-which left a pan of crumbs:


And HERE is the AFTER binding picture--nicely bound :)


See the difference????

Other things that have improved the bars' nutrition & taste for us have been:
  • 2 scoops of vanilla soy protein powder
  • 2-3 Tbsp. wheat germ
  • Any combination of nuts or dried fruit (try the Sunsweet Berry Blend-so good!)
SO....here is the revised recipe--the 'Sommerville' version that we make now-it's really awesome & it works:

BROWN RICE BERRY NUT BARS 2.0 (aka HEALTHY RICE CRISPIES)

Non-stick cooking spray or melted butter, as needed for pan
~15 oz. mini marshmallows (which ends up being about 1 1/2 (10 oz) packages)
3/4-1 cup nut butter, such as cashew, almond, peanut or hazelnut (peanut butter is our favorite)
2-3 Tbsp. butter or light butter (not included in original recipe, but will give you trouble without it)
1 10 to 12-ounce box brown rice cereal (not 'puffed' rice cereal)
1/2-1 cup dried cranberries, and/or blueberries, cherries or mixed berry blend
*1 1/2 cups nuts, chopped (pecans + cashews or almonds, walnuts, etc.)
2 scoops of vanilla soy protein powder
2-3 Tbsp. wheat germ

Lightly coat the bottom and sides of a medium baking sheet with the nonstick cooking spray or melted butter. You can either use a 9X13 inch pan for a thicker bar or a half-sheet baking pan for a thinner bar. (FYI-the thicker bars stay together better.)

In a microwave-safe bowl, zap the marshmallows, butter and nut butter, stirring after 1 minute, until melted, about 2 minutes--sometimes a little longer.

Working quickly, add the brown rice cereal, cranberries, pecans and cashews (and IF USING, the wheat germ and protein powder) to the melted marshmallow mixture and stir gently to combine – try not to crush up the bits of cereal too much--but it's ok if you do. The mixture hardens quickly.

Either wet your hands or spray them lightly with the nonstick cooking spray and turn the cereal marshmallow mixture out onto the greased baking sheet/pan. Press the mixture into the pan using your slick hands so that it's evenly distributed. Set the pan aside and let the bars set up, about 30 minutes.

Once set, cut them into squares and serve. You can serve them at room temperature or refrigerate them. They do well stored in waxed paper or parchment paper in tupperware.

Yields: About 12-14 bars--we get more like 18-22 depending on cut size.

*You can use any nuts--not necessarily those listed below. We often use almonds & pecans.

Thanks for your patience! Hope you love them! We are absolutely ADDICTED!

Tuesday, January 18, 2011

Favorite Turkey Chili


My husband LOVES this chili. It's one of our favorite things to make during the cold weather, and ESPECIALLY during Superbowl time....and the superbowl is coming up!!! This is a great meal to serve during Superbowl gatherings because you can keep it warm in the crock pot/slow cooker and serve it with toppings, tortilla chips, and cornbread on the side. Everyone assembles their own meal. It's great!

We found the recipe a few years back and have tinkered with it based on reviews and our preferences-extra garlic, lime juice, beer, cilantro in the soup, etc.--those are what make it "Sommerville Chili". But the stars and 'secret ingredients' are the cinnamon and cocoa powder. I know it might sound weird, but those ingredients absolutely MAKE this chili. Everyone that tries it loves it and always tries to figure out what "that particular flavor" is...use the lower amount of those ingredients if you are feeling unsure about the flavors the first time you make it (we use the higher amounts as many of the reviewers of the original recipe also commented that they did). It's almost like a mild mole chili.

Sometimes, chilis can have an overpowering tomato flavor--we resolved that issue by using beer instead of the 8 oz of tomato sauce can and often cut down the amount of stock. But, you can use the tomato sauce if you prefer. This turkey chili freezes very well and is delicious served on top of baked potatoes. My favorite thing to do with chili leftovers is make a Skyline chili dip. More on that later :)

'FAMOUS' FAVORITE TURKEY CHILI
Adapted from Bon Appetit
Serves 8-10.

1 Tbsp. olive oil or chili-infused olive oil (the latter is excellent!)
2 medium onions, chopped
2-3 cloves garlic, minced
1 1/2 tsp. dried oregano
1 1/2 tsp. ground cumin
1 1/2 lbs. lean ground turkey (organic if you can find it)-I often use only a pound
1/4 cup chili powder
2 bay leaves
1-2 Tbsp. unsweetened cocoa powder
1 1/2 tsp. salt
1/4-1/2 tsp. ground cinnamon
1 (28 oz) can whole or crushed tomatoes
2-3 cups chicken or beef stock (or a mix--I use Worthington brand)
1 (8 oz) can of tomato sauce OR 1 bottle of beer (we use the beer)
3 (15 oz) cans beans, rinsed, drained (white, kidney, black)
A few dashes of crushed red pepper
Juice of half a lime
Dash of marjoram

Toppings: 
Chopped red onion or green onions
Chopped fresh cilantro (I often add a handful directly into the soup instead)
Plain low-fat yogurt or light sour cream
Shredded cheese (Mexican blend or Cheddar)

Heat oil in heavy large pot over medium heat. Add onions; sauté until light brown and tender, about 10 minutes. Add garlic, oregano and cumin; stir 1 minute. Increase heat to medium-high. Add turkey; stir until no longer pink, breaking up with back of spoon (if you use whole tomatoes, you will need to break them up with the back of the spoon or spoonula).

Stir in chili powder, bay leaves, cocoa powder, salt and cinnamon. Add tomatoes with their juices, breaking up with back of spoon. Mix in stock and tomato sauce/beer. Add left over ingredients. Bring to boil. Reduce heat; simmer 45 minutes, stirring occasionally.

Add beans to chili and simmer until flavors blend, about 10 minutes longer. Discard bay leaves. (Can be prepared 1 day ahead. Cover and refrigerate. Re-warm over medium-low heat before continuing.)

Ladle chili into bowls. Pass red onion, cilantro, and yogurt--and any other toppings--separately.

**I often throw all the ingredients in the crock pot and leave the heat on low for 8-10 hours or high heat for about 6 hours. Just mix ingredients and break up the turkey/tomatoes with the back of a spoon/spoonula 2-3 hours into the cooking process.

ENJOY!

Monday, January 17, 2011

How to Roast Garlic...and Ward Off Vampires


Just kidding about the second part...

Some excellent Italian restaurants put this velvety, heady stuff on your table....roasted garlic paste is usually mixed in with good olive oil, Parmesan cheese, and salt and pepper and served with crusty, hearty bread. HEAVEN. Just heaven. There used to be a good little Italian restaurant called Cucina Roma (since closed) in Westmont that served this stuff....that restaurant made me think roasted garlic was exotic and otherworldly...until I tried to make it. One word: EASY.

Roasting garlic makes it milder in flavor. In fact, I read that raw garlic is 2-4 times stronger in flavor.

ROAST GARLIC

Quantity depends on how many bulbs you make. For every head of garlic you roast, count on 1 big Tbsp. of garlic puree. So, don't be overwhelmed thinking you are going to have too much puree by roasting a few garlic heads (heads-not cloves).

Preheat oven to 375 degrees.

Peel away as much of the outer layers of the papery skin on the garlic bulbs, leaving JUST the skins of the individual cloves intact; leave garlic bulb whole--don't separate the cloves out. Using a sharp knife, slice approximately a 1/2-inch off of the pointed end of the garlic bulbs, exposing the individual cloves of garlic. I actually think I cut off less than that...

Then, place the garlic heads in a either an aluminum foil pouch (you make) that you will place on a metal sheet pan, or a small ovenproof dish/garlic cooker/small pan. If you plan to make a lot, using a cooking sheet covered with aluminum foil is probably the best method.

Pour a bit of olive oil (about 1/4-1/2 teaspoon) over the top of each bulb and let it sink in between the cloves. Within a matter of a few minutes, it will sink in the bulbs.

(I read somewhere to then repeat by adding more oil with 1/4-1/2 teaspoon over each garlic bulb, but I am not sure if this is necessary. In fact, I used the spray olive oil this last time and it worked FINE. But that's also because I mixed the roasted garlic with some real olive oil when mashing the paste.)

Whichever method you choose, cover and bake the garlic approximately 45 to 60 minutes or until cloves are browned at the exposed end and soft throughout. Remove from oven. The bulbs will be golden brown when ready.

Let the bulbs cool--otherwise you will burn yourself while trying to push the puree out. When they have cooled, either separate the cloves out and flatten with a knife to get the puree out, or use a small spoon/fork to scoop out the flesh. Personally, I squeeze each clove to get the puree out. This is definitely NOT for the faint of heart. It's a pain, but works fastest for me.

Now what to do with it?

You can spread cream cheese on bread and then add the roasted, pureed garlic. In any case, you will love it. Or, add it to pasta sauce, add it to bread dough, add it to meat dishes, sauces, etc. You can mix the puree with goat cheese and herbs and stuff mushrooms with the filling before roasting them.

Or my favorite method: mash the puree with a fork and add some extra virgin olive oil, freshly grated Parmesan cheese, salt and pepper, crushed red pepper flakes, and Italian herbs. (See below-bread is from previous post)


STORAGE:
You can store it in the fridge for several days. I think it lasts longer if it is mixed with the olive oil. I haven't tried freezing roasted garlic puree yet, but I might sometime.


If you want to have an Italian night with company, buy some crusty Italian loaves, a good bottle of extra virgin olive oil, a hunk of Parmesan cheese, and if you prefer, a bottle of Barolo. Serve a salad and spaghetti with meatballs. Roast several garlic heads an hour before company comes--serve as above, and then watch magic happen....

Saturday, January 15, 2011

Next Chapter in No Knead Adventures: 4 Grain Pot Boule


From my new obsession....a STEAL at $2.97! I really think it was mis-marked. I honestly would have bought it at full-price!


Had a couple hours to myself this week (thank you husband for watching the kiddo) and as expected, I strolled into one of my favorite stores, Williams-Sonoma, to drool. They had a couple good deals that I was able to walk away from (namely a Le Creuset wok). One I couldn't pass up, was this book above. I think it was written for me--it may as have been titled "The Idiot's Guide to Baking." Nancy Baggett has a short and slow method for each bread. It's absolutely brilliant. I'm still trying to figure it out...
While devouring a page here and there, I came across this recipe below and tried to make it using the slower method--basically, just as the recipe stated--by the book. It took a while in waiting time, but never touched the dough--only used a spatula to flip. My stand mixer (Kitchenaid) did all the mixing. (Thanks Mom for the awesome wedding present. It is getting a lot of use.) If you have an enamel-coated, cast iron pot, it would be your BEST option as a baking vessel for these type of breads--Target & TJMaxx sells some good ones now too. I'm guessing other loaf pans may do--you just won't get that 'artisan' look.


From the Introduction to the recipe:
"In the process of using up some packages and tidying up my baking supplies, I tossed a little cornmeal, rolled oats, and rye flour into a white bread dough and discovered I’d created a combination worth repeating. The serendipitous blend lends this homey, crisp-crusted pot bread a light color and subtle, indefinable grain taste that whispers rather than shouts its mixed-grain heritage. It’s a loaf that goes with most anything and often gets compliments. It’s one of my favorites." -Nancy Baggett

EASY FOUR-GRAIN POT BOULE
From Kneadlessly Simple by Nancy Baggett

Yield 1 loaf

3¼ cups (16.25 ounces) unbleached all-purpose white flour or unbleached bread flour, plus more as needed
½ cup yellow or white cornmeal, plus 1 Tbsp. for garnish
½ cup old-fashioned rolled oats or quick-cooking (but not instant) oats
¼ cup light or dark rye flour (if unavailable, substitute 2 Tbsp. each more cornmeal and oats)
1 Tbsp. granulated sugar
2 tsp. table salt (I used sea salt)
¾ tsp. instant, fast-rising, or bread-machine yeast (I used Fleischmann's RapidRise Highly Active yeast)
2 cups ice water, plus more if needed
Corn oil, canola oil, or other mild-flavored vegetable oil or oil spray for coating dough (I used butter-flavored canola oil cooking spray)

1. First rise: In a large bowl, thoroughly stir together the flour, cornmeal, oats, rye flour, sugar, salt, and yeast. Thoroughly stir the water into the bowl, scraping down the sides until the ingredients are thoroughly blended. If the mixture is too dry to incorporate all the flour, a bit at a time, stir in just enough more ice water to blend the ingredients; don’t over-moisten, as the dough should be fairly stiff. If necessary, stir in enough more flour to stiffen it slightly (I definitely needed more flour). Brush or spray the top with oil. Cover the bowl with plastic wrap. If desired, for best flavor or for convenience, you can refrigerate the dough for 3 to 10 hours. Then let rise at cool room temperature for 12 to 18 hours; if convenient, vigorously stir once partway through the rise. (if convenient--I skipped this stirring step)

2. Second rise: Using an oiled rubber spatula, gently lift and fold the dough in towards the center all the way around until mostly deflated; don’t stir. Brush or spray with oil. Re-cover with plastic wrap.

3. Let rise using any of these methods: For a 1½- to 2½-hour regular rise, let stand at warm room temperature; for a 1- to 2-hour accelerated rise, let stand in a turned-off microwave along with 1 cup of boiling-hot water; or for an extended rise, refrigerate, covered, for 4 to 24 hours, then set out at room temperature. Continue the rise until the dough doubles from the deflated size, removing the plastic if the dough nears it.

4. Baking preliminaries: 20 minutes before baking time, put a rack in the lower third of the oven; preheat to 450 degrees. Heat a 3½- to 4-quart (or larger) heavy metal Dutch oven in the oven until sizzling hot (check with a few drops of water), then remove it using heavy mitts. Taking care not to deflate the dough, loosen it from the bowl sides with an oiled rubber spatula and gently invert it into the pot. Don’t worry if it’s lopsided and ragged-looking; it will even out during baking. Generously spritz or brush the top with water, then sprinkle over a tablespoon of cornmeal. Using a well-oiled serrated knife or kitchen shears, cut a ½-inch-deep, 4-inch diameter circle in the loaf center. Immediately top with the lid. Shake the pot back and forth to center the dough.

5. Baking: Reduce the heat to 425 degrees. Bake on the lower rack for 50 minutes. Remove the lid. Reduce the heat to 400 degrees. Bake for 15 to 20 minutes longer, until the top is well browned and a skewer inserted in the thickest part comes out with just a few crumbs on the tip (or until center registers 210 to 212 degrees on an instant-read thermometer). Then bake for 5 minutes longer to ensure the center is baked through. Cool in the pan on a wire rack for 10 to 15 minutes. Remove the loaf to the rack. Cool thoroughly.

6. Serving and storing: Cut or tear the loaf into portions; it tastes good warm, but will cut better when cool. Cool completely before storing. To maintain the crisp crust, store in a large bowl draped with a clean tea towel or in a heavy paper bag. Or store airtight in a plastic bag or foil; the crust will soften, but can be crisped by heating the loaf, uncovered, in a 400-degree oven for a few minutes. The bread will keep at room temperature for 3 days, and may be frozen, airtight, for up to 2 months.


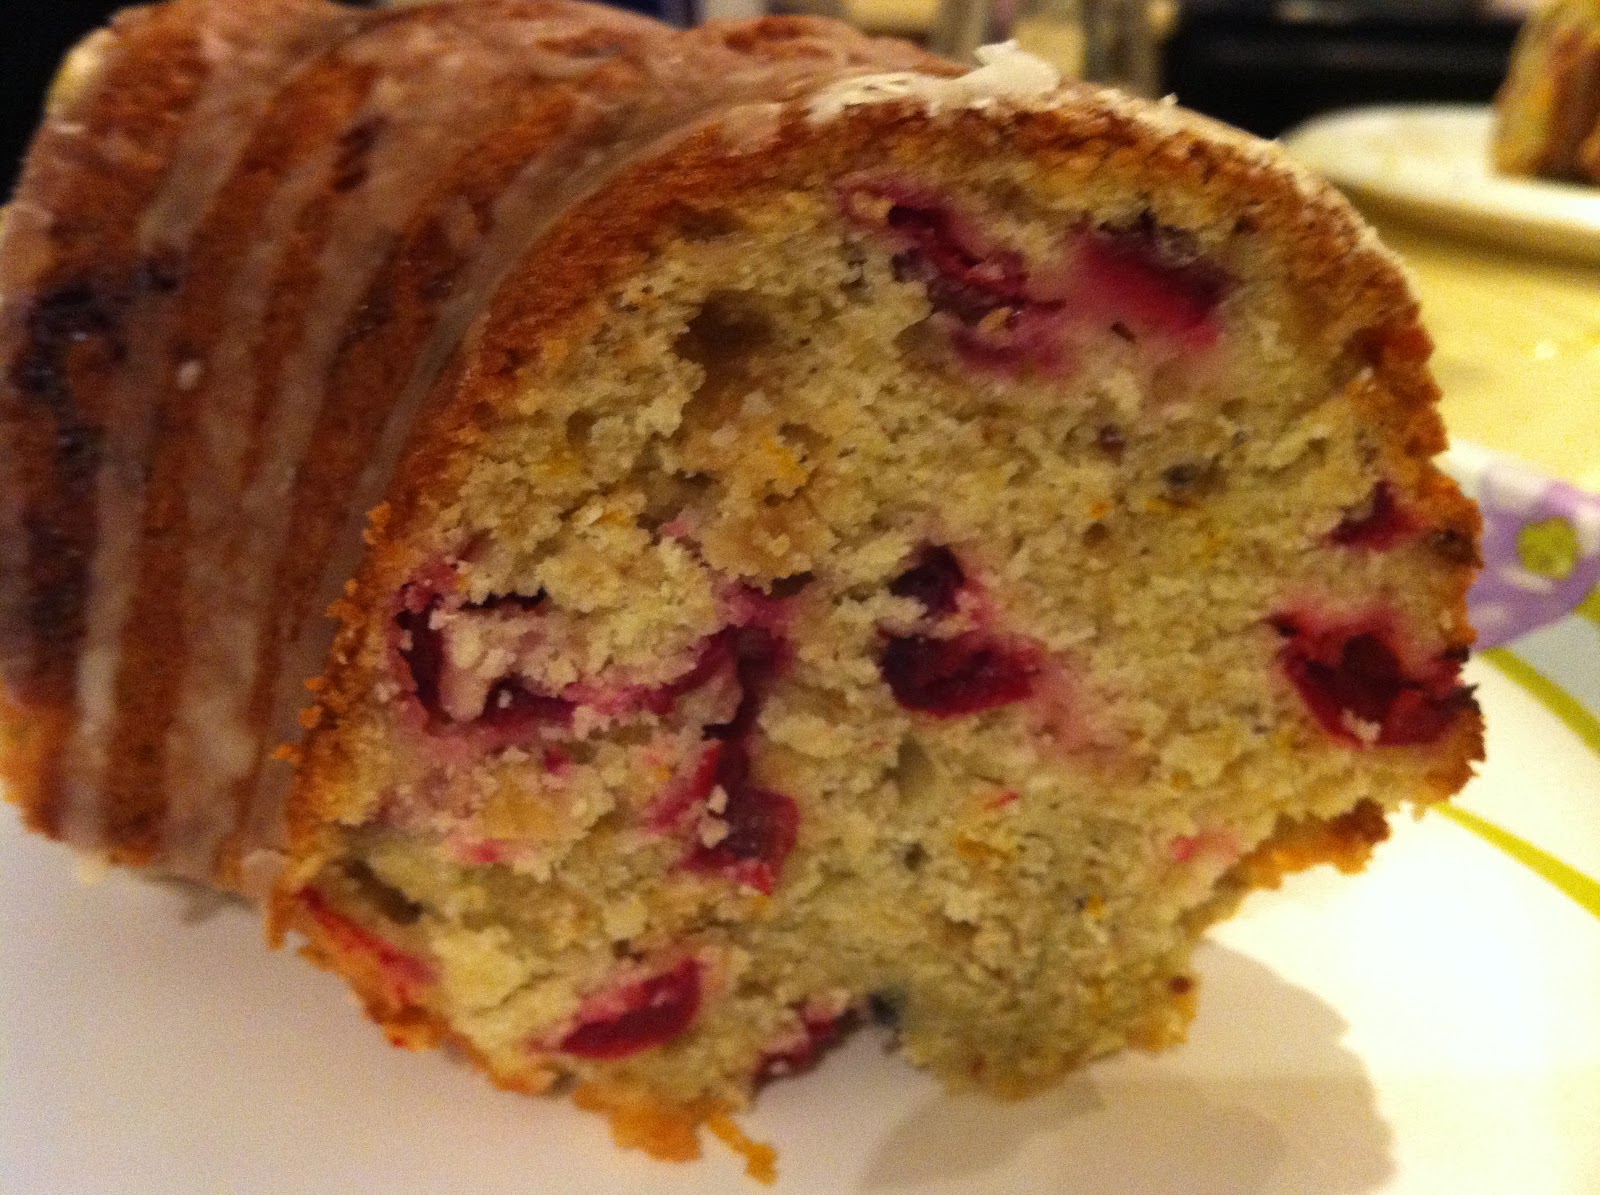
This might just be one of the BEST breads I've EVER made. Flavor & texture are really wonderful--the interior was chewy and the crust hearty and crisp. Totally beats anything I've ever bought at the store or even the farmer's market. I am excited to try the next recipe. There's something about homemade bread that just soothes the soul....makes this woman really happy anyway.

Since we're on the topic of bread, I read the BEST & funniest quote that I just have to share:

“I would say to housewives, be not daunted by one failure, nor by twenty. Resolve that you will have good bread, and never cease striving after this result till you have effected it. If persons without brains can accomplish this, why cannot you?”--’Housekeeping In Old Virginia' Marion Cabell Tyree ed. (1878)

HAHAHA!!! Now that's just awesome.

Wednesday, January 12, 2011

For Breakfast or Dinner: Baked Potato Frittata


How good does this sound? You can serve this baked omelete either for breakfast with fruit and toast or for dinner with a crisp green salad. It's a great excuse to use up leftover baked potatoes. But in case you don't have those, I included the directions for how to use uncooked potatoes in this recipe.

I don't usually have chives on hand around this time of year, so green onions fit the bill just great. We used organic nitrate-free turkey bacon. I suggest that you skip the salt in the recipe as I felt the at the frittata turned out a bit too salty since it called for bacon (a cured meat). I made half the recipe (to serve 4 people) and it worked out beautifully. Also, no worries if you don't have a frittata pan (who does?)--just use a dutch oven (you SHOULD have one of these! Haha.) or an oven-proof frying/saute pan.


BAKED POTATO FRITTATA
adapted from Williams-Sonoma

Serves 8

2 russet potatoes, 1 1/4 lb. total, scrubbed and cut into 1-inch dice
2 Tbsp. olive oil
Freshly ground pepper
10 (turkey) bacon slices, chopped
10 eggs
1 1/2 cups shredded cheddar cheese
1/4 cup, plus 1 Tbsp. minced fresh chives (or green onions)
1/2 cup light sour cream

Preheat an oven to 400°F.

In a bowl, stir together the potatoes, 1 Tbsp. of the olive oil, salt and pepper. Transfer to a baking sheet and bake, stirring occasionally, until the potatoes are golden brown and tender, about 30 minutes. Let cool for 30 minutes.

Increase the oven temperature to 500°F.

In a pan (frittata pan or oven safe frying pan or even a dutch oven) over medium-high heat, cook the bacon, stirring occasionally, until crisp, about 10 minutes. Transfer the bacon to a paper towel-lined plate to drain. Discard the fat in the pan. Finely chop 2 Tbs. of the bacon and reserve for garnish-OPTIONAL-you can always just throw everything in-still looks good. (If you use TURKEY bacon, you can skip this draining step since it won't leave extra fat--you can just set the pan aside.)

In a large bowl, whisk together the eggs, salt, pepper, 1 cup of the cheese and the 1/4 cup chives/green onions.

In the pan holding the bacon, over medium heat, warm 2 tsp. of the olive oil. Add the potatoes and diced bacon to the pan and pour in the egg mixture. Cook, using a rubber spatula to lift the cooked edges and allow the uncooked eggs to flow underneath, about 2 minutes, then cook for 4 to 6 minutes more. Continue to cook, covered, until the eggs are set, about 6 minutes. (I will come clean here and tell you that I basically let the eggs start to set as soon as I poured them in and then popped the whole dutch oven pan--uncovered--in the oven for about 10-15 minutes until it was golden. It was fantastic--no flipping and mixing and waiting. I like to make things easier when I can.).

Uncover the pan and sprinkle the frittata with the remaining 1/2 cup cheese. Transfer the pan to the oven and bake until the cheese is golden brown and bubbly, about 4 minutes.


Gently shake the pan to loosen the frittata and slide it onto a serving plate. Garnish with the reserved chopped bacon and the 1 Tbsp. chives/green onions. Serve immediately with the sour cream.


A final word about frittatas, taken from The New Basics Cookbook by Julee Rosso and Sheila Lukins, 1989, Workman Publishing:

“Frittatas are to Italians what omelets are to the French. In a frittata (or tortilla in Spain) the filling is mixed with the eggs and the whole mixture is cooked slowly in a skillet until set, then quickly browned under the broiler. Frittatas are a bit drier than omelets, not so fussy in their timing, and much easier to make for a gang. The filling ingredients are what make the frittata so wonderful, but it’s the eggs that bind everything together. Frittatas can be served hot right in the skillet or left to cool at room temperature. They can be cut into pie-shaped wedges for brunch or supper or little squares for appetizers…”

Tuesday, January 11, 2011

Best. Salad. Ever.


This salad is inspired from my favorite little romantic, yet humbled, Northern Italian restaurant in Charleston, South Carolina. My husband and I love to eat here when we're on vacation. We love to drink Prosecco and eat freshly baked foccacia at Al Di La. It's off the beaten path, away from the tourists, and packed night after night. Sometimes you have to sit at the bar or on oak barrels in the bar area and wave like a madman to get served.

There are SO MANY things I love to eat at this restaurant--the gnocchi, the tiramisu, the halibut with lentils....one day I got a wild hair to go talk to the chef and he was kind enough to tell me how my favorite salad is made. Unforunately, he could not give me exact measurements--but the rough proportions still allowed me to work it all out successfully. Luckily, it's not an exact science and you can make this salad at home just as good as it tastes in the restaurant. I LOOOOVE this salad and think you will too--it's one of my few deviations into 'sweet+savory=pretty good' as far as non-dessert items go. I'm just not a fan of all the fruit thrown into salads...there's a time and a place for it in my not-very-humble opinion (sorry). And most often, in my twisted world, fruit belongs in desserts...except here :)

There are a million versions online for this salad with some of these ingredients (so obviously it's a hit), but the mix of ingredients below are my favorite: simple, elegant, fresh, and SPECTACULAR. The crunch of the nuts, the peppery aspect of the arugula, the tartness of the orange, and the creaminess of the cheese...I don't like to sing...but I just might, if you served this to me. It may just be one of the things I ask for if permitted a 'last meal'....try it.

ARUGULA SALAD WITH GOAT CHEESE, WALNUTS, ORANGES, AND BEETS

Fresh arugula, rinsed, patted dry with a paper towel--baby arugula is great
Goat cheese (chevre), crumbled
Walnuts or pecans, chopped or left whole
Navel oranges, in segments (peeled and pared-without membranes)
Beets (boiled until a fork easily goes in it, about an hour), peeled, sliced into strips OR canned beets, drained)

Dressing--Mix together equal parts of:
Extra virgin olive oil
Fresh orange juice
Balsamic vinegar
Salt & cracked pepper, to taste

Toss together the arugula, orange segments, nuts, and crumbled goat cheese with dressing (LEAVE OUT the beets unless you want your whole salad to be entirely pink). Assemble the salads by plating the dressed arugula salad on each plate and add beets on top of your salad.


Serve this salad COLD (sometimes when I get really crazy, I chill the salad plates in advance before plating this salad--I swear it makes a difference!).

Monday, January 10, 2011

Basil Tomato Soup with Battered Okra


This was a truly Southern American meal....

It was SO exciting to finally try this soup! We have a friend staying with us for a couple nights & I finally got a reason to make this recipe I got out of Southern Living months ago. It was a huge hit with the guys & have a feeling this will be a hit with guests and family of all ages if you make it in your home.

I've changed the recipe to make it easier--the original recipe called for whole tomatoes and then using a blender, but why not just use pureed/crushed tomatoes and eliminate that step?? It worked awesome to do less work. And, the half & half really made it.

We had this soup with some sliced honeycrisp apples and clementine tangerines (got to make an effort to counteract the sauteed okra--which by the way, was totally worth it) and pimento cheese toasts (if you can get the Palmetto cheese brand, GET it! It's amazing. Some Costcos sell it. It's not some sweet, fake cheese spread--it's the real thing.). To make pimento cheese toasts, just spread pimiento cheese onto crispy multi-grain European bread and broil until cheese gets hot, melty, and bubbly. It's to die for!


BASIL TOMATO SOUP WITH BREADED OKRA
adapted from Southern Living

Makes 15 cups (or about 8 servings)

2 medium onions, chopped
3-4 Tbsp. olive oil
3 (28 oz.) cans crushed tomatoes (Italian-style only if you can find it)
1 (14 oz.) diced tomatoes
1 (32 oz.) can (or 4 cups) chicken broth or vegetarian 'chicken' broth like McKay's
1 cup loosely packed fresh basil leaves or 1/3 cup dried basil (+ extra 2 Tbsp basil if you can't find Italian-style tomatoes)
3-4 garlic cloves
1 tsp. lemon zest
1 Tbsp. lemon juice
1 tsp. salt (or slightly more as the lemon can make it too tart)
1 tsp. sugar
1 cup half and half
Parmesan cheese (optional)

Sauté onions in hot oil in a large Dutch oven (or soup pot) over medium-high heat 9 to 10 minutes or until tender. Add tomatoes and broth. Bring to a boil, reduce heat to medium-low, and simmer, stirring occasionally, 20 minutes.

Add the rest of the ingredients (EXCEPT for half & half) and cook 10 minutes or until thoroughly heated. Mix in the half and half. Turn off heat.

Meanwhile, cook okra according to package directions (I sauteed the okra with Pam-style cooking spray). Serve with soup (on top of). Sprinkle with Parmesan cheese (if desired).

A Hungry's Woman's Snack: Italian Nachos


If Italians made nachos, this is what I imagine they would be like...

It was created from hunger. And it was AWESOME. By accident. Sometimes, like myself, you may have an impulsive buy on something random like...Italian toasts (aka Panetini). And then halfway through the bag, you start to wonder what else you can do with them.

Feel free to add other ingredients--sausage or veggie sausage would be delicious on these too. And if you don't have fresh mozzarella, regular shredded mozzarella.

But, once again...I have no measurements for this recipe. If you are so regimented that you cannot cook without precise measurements, you are wasting your time on this blog--because I am not a regimented person. You'll have to use your judgement and put more or less of what you like and don't like into this 'creation' (for lack of a better term). Somehow, I feel like I might have insulted the Italians with this creation. Sorry.

ITALIAN NACHOS

Italian toasts or panetini (Nonni brand is very good)
Bruschetta topping (or a homemade concoction of diced tomatoes, dried basil, garlic salt, and olive oil)
Red onion, chopped
Mushrooms, chopped and sauteed
Basil pesto
Kalamata olives, chopped
Fresh (Buffalo) mozzarella, roughly chopped
Parmesan cheese, freshly grated
Salt & pepper, to taste
Extra virgin olive oil (optional)

Layer all ingredients in a pan (I used a small non-stick sheet pan). Start with the toasts and layer all the ingredients--dropping bruschetta topping and pesto onto the ingredients and ending with cheese(s). Feel free to season and drizzle with olive oil.

Broil (on low if you can) or roast until the cheese melts and starts to slightly brown.

Makes a really good appetizer. I hope you like it.


Sunday, January 9, 2011

Orange Cranberry (Drop) Scones (Slightly Adapted With Whole Wheat Flour)


This morning, my kitchen was a haven with classical music (Enescu), the smell of oranges (from the grated rind), coffee brewing, and a chatty toddler at my heels.

Ok, so these are not the most attractive scones you'll ever eat...but they are sooooo good! Cranberry orange scones are my favorite scones. I hadn't made this recipe in years--because it's a two-sticks-of-butter recipe (sigh). But today, the easiest scone recipe I've ever come across (no shaping the dough!!!), got gleefully dusted off.

Husband: what are you making?, Wife: Scones. But healthier. With whole wheat flour...and maybe some light butter. Husband: (Inaudible muttering accompanied by a sigh).

Because I CAN. I'm sure he's wondering why ruin a good thing...so HERE is the original recipe (made with currants-but who has currants lying around?) just in case you don't want to mess with perfection--because the original recipe REALLY is perfection (especially if you add white chocolate chips). But if you try to sneak in a little whole grain and lower a tiny bit of fat in your recipes, try my version below. You really won't miss the original. That much.

A bit of whole wheat pastry flour won't destroy the integrity of this drop scone. I promise. It's still VERY good. Crumbly texture...crispy crust...soft interior. Heavenly with coffee.....These scones are not very sweet-as authentic scones really shouldn't be--and you can control the sugar content of the topping too. These are cakier rather than drier scones. I'm sure if you baked them longer and at a lower temperature, they may get drier (or let them sit out longer).

Final result? Husband said 'they're really good' and my toddler inhaled two today without making a single sound. Did I mention I ran back in the house as we were leaving just to grab another? YUM! But just once in your life...make them with all white flour. They orange color comes out brighter and they are wonderful to serve to company .

ORANGE CRANBERRY DROP SCONES
adapted from Gourmet magazine

Yield: 24 scones

4 cups all-purpose white flour (I used 2 cups all-purpose & 2 cups whole wheat pastry flour)
3 Tbsp. sugar (any sugar will do, really)
2 tsp. baking powder
2 tsp, baking soda
1/4 tsp. salt
*2 sticks (1 cup) butter, cut into bits
3 Tbsp. freshly grated orange zest (from about 2 navel oranges)
1 1/2 cups dried cranberries
1 cup plus 2 tablespoons well-shaken buttermilk (I used low-fat)
2 large eggs
1/4 cup granulated raw sugar (turbinado or Demerara--gives you that crystalized look)

Optional Add-ins:
white chocolate chips
nuts

In a bowl of a standing mixer fitted with paddle attachment stir together flour, granulated sugar, baking powder, baking soda, and salt. Add butter and zest and beat until mixture resembles coarse meal. Beat in currants (and any optional ingredients). In a bowl whisk together buttermilk and eggs and add to flour mixture, beating just until a dough forms. (Dough will be sticky and will not seem completely mixed-that's ok--better not overwork the dough so you don't get tough lumps).

Preheat oven to 350°F. and line 2 baking sheets with parchment paper. On each sheet arrange mounds of dough about 1 inch apart. Sprinkle mounds with raw sugar and chill 15 minutes.
Bake scones in upper and lower thirds of oven, switching position of sheets half-way through baking, until light brown, about 20 minutes. (your total baking time is 20 minutes at most)


*One of the recipe reviewers stated they used 1/2 cup less butter than called for. I tried it but my dough was quite clumping as it should. So, at the last minute I added 1/2 cup of LIGHT butter. I am not sure I'd do all whole wheat flour and all light butter--you won't get the same wonderful texture-sorry.

ENJOY! ENJOY!